Preparing Cabinets for Sealing
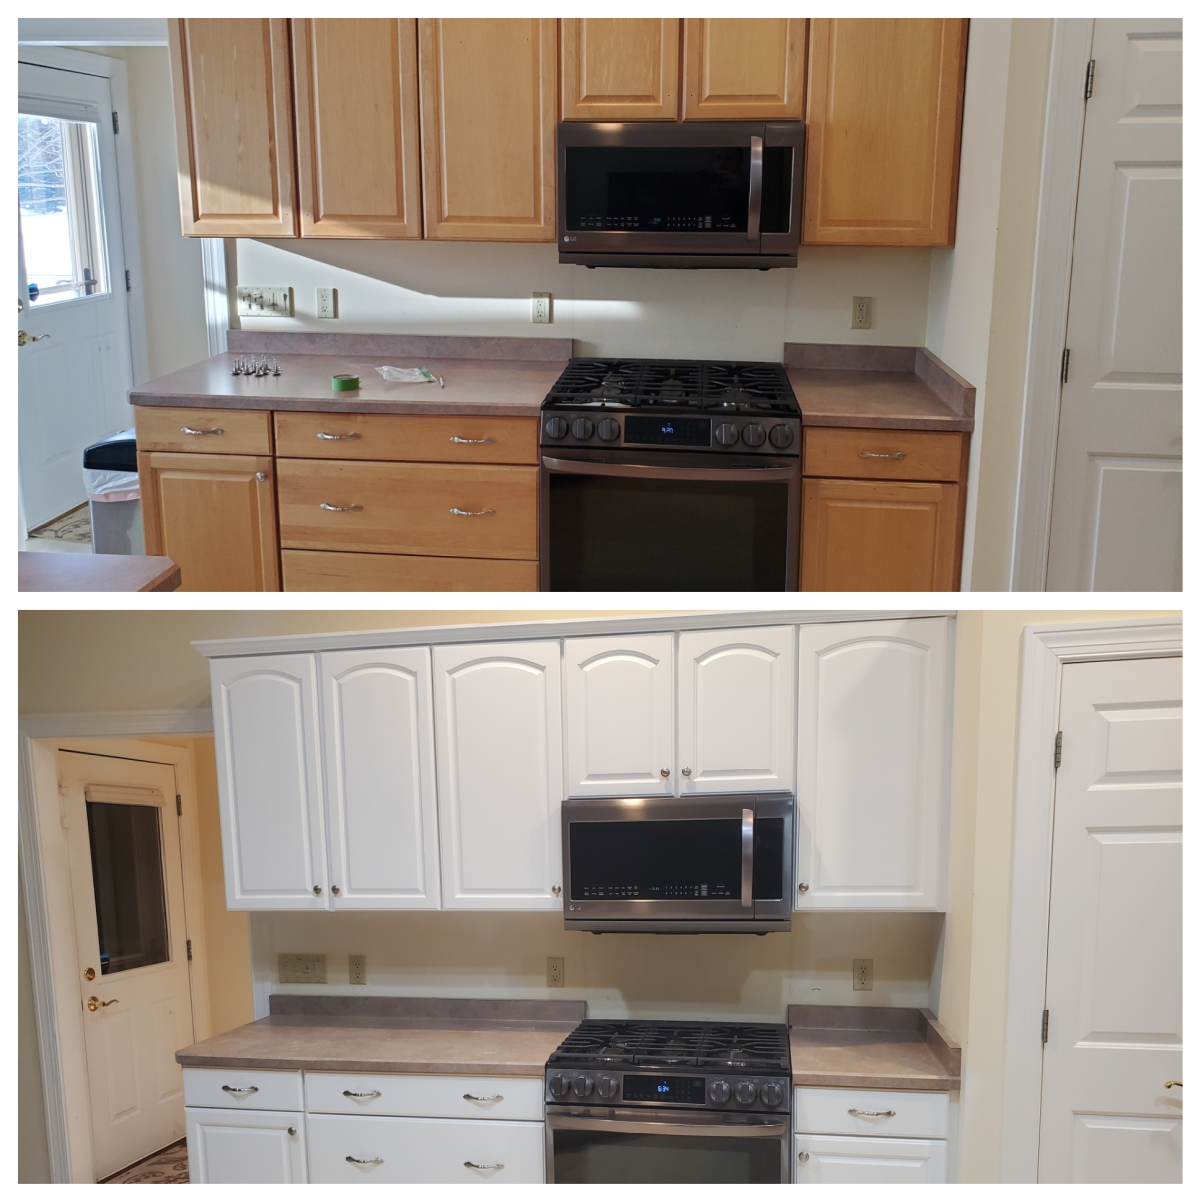
Before you can seal your painted cabinets, it’s crucial to ensure the paint surface is clean, smooth, and free of any imperfections. This step is essential for a successful and long-lasting seal that will enhance the beauty and durability of your cabinets.
Cleaning Painted Cabinets
Cleaning your painted cabinets thoroughly removes dirt, grease, and dust, allowing the sealant to adhere properly to the surface. Here’s a step-by-step guide:
- Start by wiping down the cabinets with a damp cloth and mild dish soap. This will remove any loose dirt and grime.
- Rinse the cabinets with clean water and dry them thoroughly with a clean cloth. Ensure all surfaces are completely dry before proceeding to the next step.
- If you encounter stubborn stains, use a specialized cleaner designed for painted surfaces. Always test the cleaner on an inconspicuous area first to ensure it doesn’t damage the paint.
Sanding Painted Cabinets
Sanding the cabinets creates a smooth surface that promotes better adhesion of the sealant. It also helps to remove any imperfections or inconsistencies in the paint finish.
- Use fine-grit sandpaper (220-grit or higher) to lightly sand the cabinet surfaces. Avoid applying too much pressure, as this could damage the paint.
- Focus on sanding any rough spots, scratches, or imperfections in the paint. Sand in the direction of the wood grain for a consistent finish.
- After sanding, wipe the cabinets clean with a tack cloth to remove any dust particles. This ensures a clean surface for the sealant.
Identifying and Addressing Paint Imperfections
Before sealing your cabinets, carefully inspect the paint finish for any imperfections. These could include:
- Cracks or Chips: If you notice any cracks or chips in the paint, you can use a paint filler to repair them. Apply the filler according to the manufacturer’s instructions and allow it to dry completely. Then, sand the filled area smooth using fine-grit sandpaper.
- Uneven Paint: If the paint appears uneven or has brushstrokes, you can use a sanding block to smooth out the surface. Sand gently in the direction of the wood grain until the paint is even.
- Drips or Runs: Drips or runs in the paint can be sanded down using fine-grit sandpaper. Sand gently and carefully to avoid damaging the surrounding paint.
Remember, a well-prepared surface is crucial for a successful sealant application. By following these steps, you can ensure that your cabinets are ready for a beautiful and durable seal.
Choosing the Right Sealant
Selecting the appropriate sealant is crucial for protecting your painted cabinets from wear and tear, ensuring their longevity and maintaining their beautiful finish. The sealant acts as a protective barrier, shielding the paint from scratches, stains, moisture, and UV damage. The type of sealant you choose will determine the level of protection, the appearance of the finish, and the ease of application.
Types of Sealants, How to seal painted cabinets
The most common types of sealants for painted cabinets include polyurethane, acrylic, and wax. Each type has its own unique properties, making it suitable for different needs and preferences.
- Polyurethane: Polyurethane sealants are known for their exceptional durability and resistance to water, scratches, and abrasion. They offer a high-gloss finish, enhancing the vibrancy of the paint color. Polyurethane sealants are available in both oil-based and water-based formulas. Oil-based polyurethane provides a harder, more durable finish but requires longer drying times and emits strong fumes. Water-based polyurethane is easier to apply, dries faster, and produces less odor.
- Acrylic: Acrylic sealants are water-based, making them easy to apply and clean up. They offer a durable finish with good resistance to water and stains. Acrylic sealants are available in various sheen levels, from matte to high-gloss, allowing you to customize the look of your cabinets. However, they are not as durable as polyurethane sealants and may require more frequent reapplication.
- Wax: Wax sealants provide a natural, soft finish that enhances the beauty of the paint without altering its color. They offer some protection against scratches and moisture but are less durable than polyurethane or acrylic sealants. Wax sealants are typically applied in thin coats and require regular reapplication to maintain their effectiveness.
Choosing the Best Sealant
The best sealant for your painted cabinets depends on factors such as the type of paint used, the desired finish, and the level of protection required.
- High-traffic areas: For cabinets in high-traffic areas, such as kitchens and bathrooms, polyurethane sealant is the most durable option. It provides excellent protection against scratches, stains, and moisture.
- Matte finish: If you prefer a matte finish, acrylic sealant is a good choice. It offers a durable finish with a subtle sheen.
- Natural look: For a natural, soft finish, wax sealant is a good option. It enhances the beauty of the paint without altering its color.
- Ease of application: Water-based sealants, such as acrylic and water-based polyurethane, are easier to apply and clean up than oil-based polyurethane.
- Budget: Wax sealants are generally the most affordable option, followed by acrylic sealants. Polyurethane sealants are typically the most expensive.
Applying the Sealant: How To Seal Painted Cabinets

Now that your cabinets are prepped and you’ve chosen the right sealant, it’s time to apply it. This step is crucial for achieving a durable and long-lasting finish. Applying sealant correctly will ensure your cabinets are protected from moisture, stains, and everyday wear and tear.
Applying the Sealant
To ensure a smooth and even application, start by applying the sealant in thin, even coats. Use a high-quality brush or roller designed for the type of sealant you’ve chosen. Apply the sealant in the direction of the wood grain, working in small sections at a time. Allow each coat to dry completely before applying the next. Drying times will vary depending on the sealant type and environmental conditions, so consult the manufacturer’s instructions for recommended drying times.
Tips for Achieving a Smooth Finish
- Avoid drips and runs: Apply the sealant in thin coats, and avoid overloading your brush or roller. If you do get drips, use a clean cloth to wipe them away immediately.
- Smooth out any imperfections: If you notice any unevenness or brush strokes, lightly sand the surface with fine-grit sandpaper before applying the next coat.
- Consider using a sealant with a self-leveling formula: These sealants can help to smooth out any imperfections and create a more uniform finish.
Ventilation and Safety Precautions
It is crucial to ensure proper ventilation when working with sealants. Many sealants contain volatile organic compounds (VOCs), which can be harmful if inhaled. Work in a well-ventilated area, and wear a respirator mask to protect your respiratory system. It is also advisable to wear gloves and eye protection to prevent skin and eye irritation.
How to seal painted cabinets – Sealing painted cabinets is an important step in protecting them from moisture and wear. While sealing, it’s essential to consider the overall design of the space. For instance, if you’re aiming for a modern aesthetic, incorporating recessed lights in bedroom layout can enhance the look.
However, make sure the lighting doesn’t cast harsh shadows on the cabinets, as this can detract from the finished look. Once the cabinets are sealed, you can enjoy their durability and the overall visual appeal of your space.
Sealing painted cabinets is essential for durability and a smooth finish. A good sealant protects the paint from scratches, stains, and moisture, ensuring your cabinets stay beautiful for years to come. If you’re considering a more ambitious project, you might be interested in making custom cabinet doors – a project that can truly transform your kitchen or bathroom.
No matter the scale of your project, proper sealing is key to achieving a professional, long-lasting finish.

